Hoist Fitness V5 vertical home gym — how to move it mostly complete — by removing only the weight stack
© 2019 Peter Free
21 May 2019
Caveat — safety
If you never work on heavy things or in potentially dangerous situations by yourself, this blurb is not for you.
How to move an assembled V5 — minus only its weight plate stack
This is an addendum to what I have previously written about geographically moving Hoist Fitness's discontinued V5 vertical column plate gym.
In that previous blurb, I assumed that the V5 was destined to be:
transported by "normal" movers — who sensibly insist on reducing both its weight and size
and
moved into a "normal" house with conventionally sized doorways.
Today, we tackle a more tempting way to reduce the amount of effort required in moving this thing. Here, by only removing the V5's weight plate stack and going "big guy size" from there.
Keep in mind that — if you leave the V5 mostly assembled
You will need doorways wide and high enough to get the assembled V5 frame through. This qualification leaves out virtually all normal home interiors.
Even most garage doors are too low for the V5's seven foot tower. You will need to tilt the gym considerably to get it underneath.
This raises a specific safety issue
With the plate stack removed, the V5 becomes noticeably top heavy. It will want to fall over, whenever it is tilted out of vertical.
This trait makes levering the V5 (minus its plate stack) onto furniture dollies by oneself more challenging than one may realize.
If you are not very careful doing this, working alone as I nearly always do, the V5 will try to fall on something.
I've had to catch mine a number of times. Those "happenings" remind me that my wife's description of me as "self-destructively nuts" is more accurate than I want to admit.
First, download a copy of the V5 manual
Hoist Fitness has changed the URLs for its owner's manual. So here, I give you general directions on how to find it:
Go to www.HoistFitness.com.
Mouse over (but do not click on) "Support" in the top menu.
Notice the sub-menu that pops up as your mouse hovers.
Click on "Customer Downloads" from that horizontal list.
Look for "Archived Owner's Manuals".
Click in the "Choose" box and scroll to the very bottom of the list to find the V5.
Select and click it. A PDF downloads.
Necessary tools
The V5 uses American-sized nuts and bolts.
You will need a 9/16 inch socket, a socket extension and a 9/16 wrench.
Alternatively, two adjustable crescent wrenches.
You will also need a 1 inch (or so) thick board — 3 inches wide by 72-75 inches long.
Below, I do not deal with the V5's stupid plate column shields
As I explained in my earlier V5 how-to, I no longer use the plate shields (meaning the protective shrouds) that come with the gym.
They are a poorly designed PITA to install or remove. Consequently, I have omitted the steps necessary to take them off.
Step 1 — pivoting the arch (what Hoist calls the "top mainframe assembly") out of the way
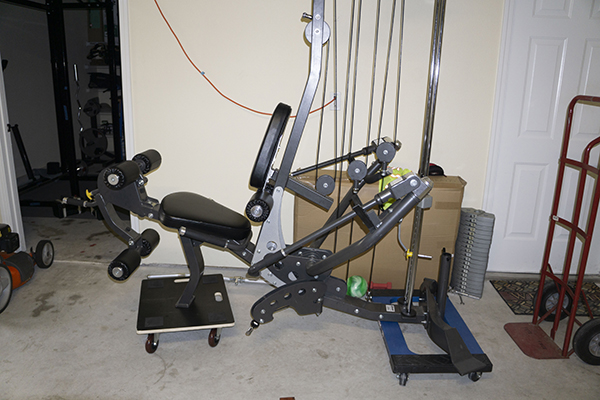
Look at the blue painter's tape in the below photograph.

Completely remove the through-bolt labeled "remove" — using a 9/16 inch socket and a 9/16 wrench.
Loosen (but do not remove) the bolt labeled "pivot" — using the same tools.
Go to the rear of the machine, where the weight plates and guide rods are.
Look up toward the top side of the rear flange of the arch.
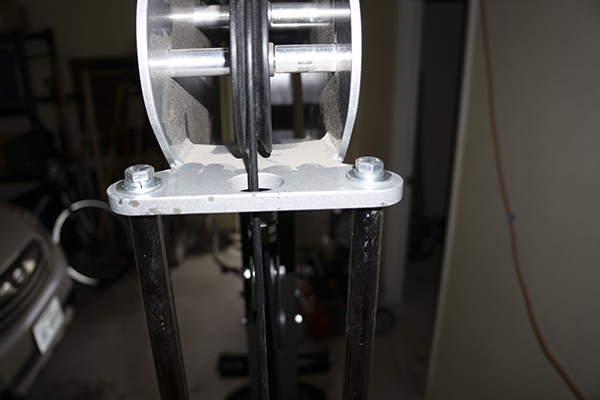
Notice that the weight plate guide rods are bolted through the arch's rear flange.

These guide rods are the only things supporting the rear end of the arch.
Remove the guide rod top bolts with the 9/16 socket and extension, or the 9/16 wrench.
The arch can now pivot forward — meaning toward the seat end of the machine.
Your goal is to create enough room between the arch and the top of the guide rods to slide each of the weight plates out from the column.
It will take some effort to push the arch up. It is heavy.
Prop the arch up (in a higher position) with the 72-75 inch board.

Step 2 — what to do with plate 1
Plate 1 is what Hoist calls an "8.50 lbs cast radial top weight". It sits on the top of the plate stack.
Attached to plate 1 is a "21 hole weight stem". This is the multi-holed rod that goes down through the center hole of each plate in the weight stack. Moving the stack pin — from hole to hole — lets you adjust the number of plates that you will be exercising with.
These two items are items 25 and 18 on pages 7-8 of the Hoist V5 owner's manual.
Your eventual goal — with plate 1 and its 21 hole stem — is to leave them intact, so as to keep the cables tensioned, after you have unloaded the plate stack.
If you don't put some tension on the cables, you run a slight, but unnecessary risk of having them twist while you are doing everything else.
To start the process, pull down on the cable that drops from rear arch pulley and attaches to plate 1.
Simultaneously, lift up on plate 1 (with its stem still attached) and try to wiggle them through the space that you have created at the top of the guide rods.
This is harder to do than it looks — unless you have a longer prop board than I had access to.
You may have to let go of the cable and use 2 hands to work the plate and plunger clear of the guide rods.
Once plate 1 (and stem) are clear of the column, let them hang on the forward side of the rods. Meaning on the gym's seat end.
Step 3 — hauling the stack of plates up and out
You will remove these one by one, due to the lack of clearance (for more) at the top of the guide rods.
Getting them past the dangling stem and plate 1 is the main irritation here.
You could probably use cord to tie the holed stem to the gym's center vertical support. That should keep plate 1 out of the way.
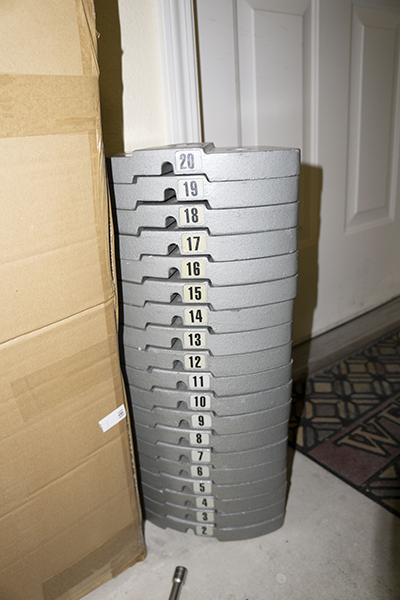
As each weight plate comes up and out, stack it on the floor. Your pile will be in reverse order of the way they sat in the gym.

This reverse order is what you want. Otherwise, when you eventually put everything back together, the plate numbers will be out of proper order.
Once you reassemble the gym — after your move — plate 1 should again be at the top and plate 20 at the bottom.
Step 4 — reassembling what you just undid (for the move to the new place)
Return plate 1 and its attached 21 hole stem to their proper position on the guide rods.
Reinsert and tighten the bolt that you removed from the arch.
This will take some determined wiggling. The arch always moves a little from its original position and the holes no longer line up.
Reattach the two bolts that you took out of the guide rods.
Retighten the pivot bolt.
The V5 is ready to move.
Step 5 — getting the V5 to wherever it is going
This is the part that I have not done with only the weight stack removed.
I've never moved from and to houses that have doorways big enough to move it this way.
Therefore, what follows is just common sense based on my experiences moving this thing in varying states of disassembly.
First, you will almost certainly want to put it on furniture dollies to move it out to a vehicle.
The V5 is so ungainly and has such comparatively sharp edges that carrying it is dangerous with inexperienced help. If one person loses grip or missteps, the other person (or people) are going to suffer.
I am able to get the V5 onto furniture dollies — with and without its weight stack — by myself.

That is, admittedly, always an adventure. Trying to use a hand truck to lever the V5 up off the floor and simultaneously slide something under the gym with one foot is challenging. Someone considerably taller than I am would have less trouble making the reach.
In struggling with sliding wood chunks or dollies into place, be careful not to get a foot or hand caught under the gym. Under some circumstances, I suspect that the edges of the gym's steel feet could slice a finger or toe off.
Pieces of wood and dollies often slide out of desirable position, while the weight of the gym is lowered down onto them. This has caused me some dangerous toppling situations. I have had to move quite sprightly (for an old guy) to prevent disasters.
Choosing a vehicle to move the thing comes next.
Your first choice should be a low-bed utility trailer. One with a solid floor, rather than the uselessly weak steel mesh that manufacturers have a penchant for. The V5's small and sharply edged feet will probably punch holes in that sort of mesh before you drive very far.
Tie the thing down properly. A weight stack-lacking V5 is so top-heavy that it is likely to tumble over, under the slightest lateral acceleration. If it does, you are probably going to sustain major damage to something or someone.
A cautious person might consider trying to transport the V5 in a lying down position. I would not. The gym's arms are the problem. They essentially float inside the frame. Subjecting them to this kind of torsion would probably damage the gym's mechanics. The arms also have projecting (and easily broken) plastic arm-parking clasps.
If you use a pickup truck, especially one of the ridiculously high modern ones, you're going to have significant trouble loading the gym onto it. For that, I would probably begin with a solid ramp and hope to roll or slide the gym up it.
Here, it is not the gym's weight that is the major hindrance. It is its ungainly design. The gym's entire weight rests on two small feet at the weight stack end and one small one at the front (where the seat is). Because the gym's bench press arms project out as far as they do, there is no way to approach the gym's center of gravity, so as to efficiently hoist it up.
I can certainly think of a few ways that I might manage this lifting by myself. These unsafe methods are left over from my poverty farming days. The work-arounds are dangerous enough that I will not mention them here. Being suspected of being crazy is better than demonstrating it.
Step 6 — reassembly, when you get to where you are going
This is reverse of what we just did.
After replacing the weight plate stack in its proper place, check the gym's cables for two things. First, ensure that they are still properly routed in their pulley grooves. Second, be sure they are not twisted.
The cable most likely to slip out of its pulley grooves undetected is the one that goes to the leg extension at the front end of the gym. You may have to check its pulleys by feel. They are difficult to see.
If the leg extension cable has slipped out of its pulley grooves — and you do not detect that — its vinyl coating will soon shred.
With regard to twists, you will usually see these in the strained way that the pulleys hang. Or sometimes in the unsmooth way the gym operates. If cables cross and touch at the same time, you probably have problems.
Getting these twists out is a simple matter of identifying which cable and pulley(s) are affected. You can do this by feeling the pulley itself. Which way is the pulley applying pressure to your hands?
The untwisting logic here is identical to swirling a garden hose (in air) to remove twists that coiling it up has introduced.
Usually, you can remove the pulley in question and rotate its horizontal axis to unload the pressure. Then, reconnect it to the machine.
Sometimes, disconnecting one fixed end of the cable is necessary.
A reminder
If you want to do the described weight stack removal and V5 move — and you are more social than I am — gather friends to assist.
If you are essentially a loner, assiduously watch your Crazy Quotient. Beware its red line.
 PeteFree.com