 PeteFree.com
Hopkins plug-in vehicle wiring harness — with 4-pole flat trailer connector — on a 2010 Subaru Outback — a review
© 2020 Peter Free
13 January 2020
Hopkins plug-in vehicle wiring harness — with 4 pole connector — is item HM11143865 — at etrailer.com
Unlike the other harnesses at etrailer, this one is designed to emerge through the rear hole in the bottom of the Subaru's spare tire well.
The other designs have to be lifted out through the underside of the car's hatchback lid, every time you use them.
I installed the Hopkins wiring harness on a 2010 Subaru Outback.
A couple of installation notes
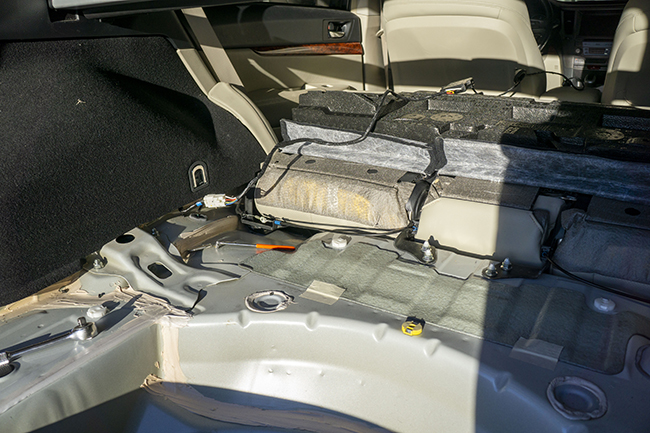
First — disassemble further than the Etrailer video recommends
Contrary to Etrailer's installation video (on a 2014 Outback), it is arguably better to:
remove the bolt that fastens the left side tie-down
(on the driver's side hatch wall)
as well as
the side-to-side foam and carpet crosspiece
(which lies forward of and higher than the donut spare well)
so as to
get to the driver's side factory-installed connector
which the Hopkins harness connects to.
Otherwise, you will not be able to see, or reliably feel, what you're doing.
On my car, the factory connector was much more firmly taped to a loop in its own wiring than the Etrailer video indicated.
Reaching blindly and yanking seems a bad idea because one will have no idea what other wiring might be in there.
To get a better view of this connector, lift the side-to-side foam and carpet crosspiece up and forward, toward the front of the car.
Once you flip that piece forward — and the tie-down bolt has been removed — you can pull the side panel (which conceals the connector that you want to plug into) out far enough to see it.
If in doubt, use a flexible mirror to confirm.
Second — avoid requiring a second person to confirm that the Hopkins works
Etrailer sells the Curt LED 4-way flat connector tester (item i26). You can use it to test the Hopkins' functions.
Again contrary to Etrailer's videos — if you are working solo — it is easier to connect the Hopkins harness and then run it forward, toward the driver's console.
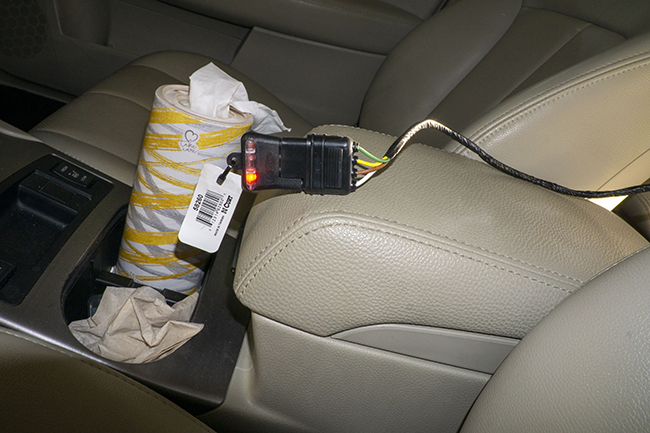
There, with the tester's lights facing up, you can sit in the driver's seat and go through braking, turn signal and light functions one by one.
Once that was done, I routed the harness back into the donut tire well and tried a number of alternative positions for the Hopkins module.
Here is where the harness' slightly less than ideal proportions snuck in.
Mild glitches
The box that my sample of the Hopkins harness came in labeled it for a Subaru Forester. That may explain why the Hopkins' wiring lengths are not ideal for the Outback.
Evidently, Hopkins never looked a 2010 Outback, when it designed the module's wiring lengths.
The first problem is the module's bulk. It interferes with the foam liners that Subaru covers the car "trunk" with.
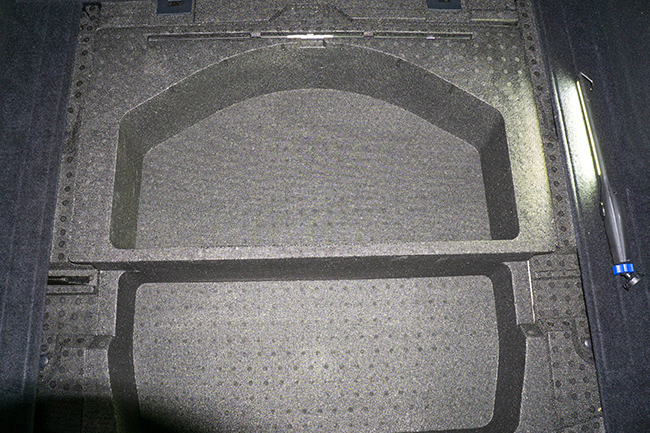
Ideally, one would either mount the module on the forward or aft corners of the well, or under the spare. Or perhaps, even atop one of the side carpet panels and out of the way.
In trying all these positions out, you will find that the wire (on the hitch side of the Hopkins module) is too short. It will not run through the hole in the bottom of the spare wheel well — if you mount the module on the forward left corner of the well.
Similarly, the Hopkins' wire length in front of the module is too short to reach the rear left corner of the well.
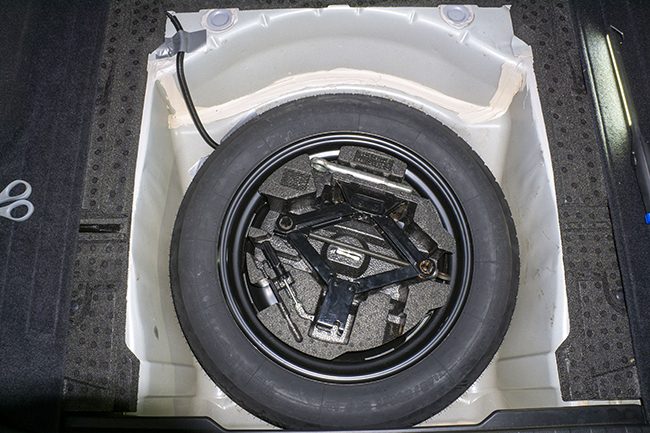
Given those parameters, to avoid the possibility of knocking the module around every time you remove the spare, it is preferable to mount the module under the spare tire.
Keep in mind that you may be removing the spare tire more often than you might think:
Removing the donut wheel is necessary every time you inflate it back up to its required 60 psi pressure.
The donut (in our car) loses air over time, as all tires do. I pump it back up twice a year. Because Subaru has the spare tire valve facing downwards into the well, one cannot get to its inflation valve, without tilting the tire nearly vertical in the well. Or taking it completely out of the car.
The Hopkins module will fit into the space left between the tire's bead (on the wheel rim) and the center of the steel wheel.
Photos — showing preliminary and final harness routings — in the spare tire well
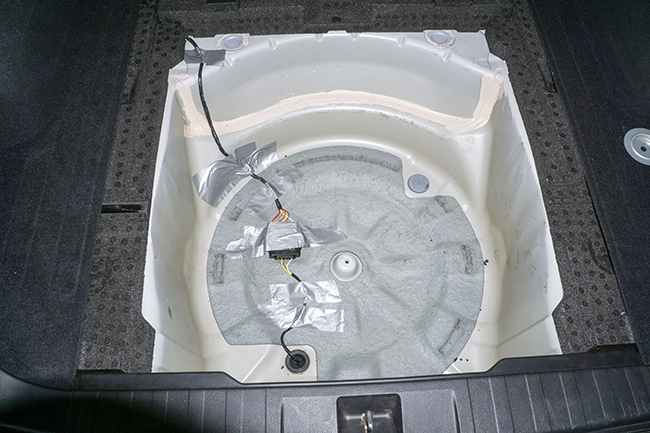
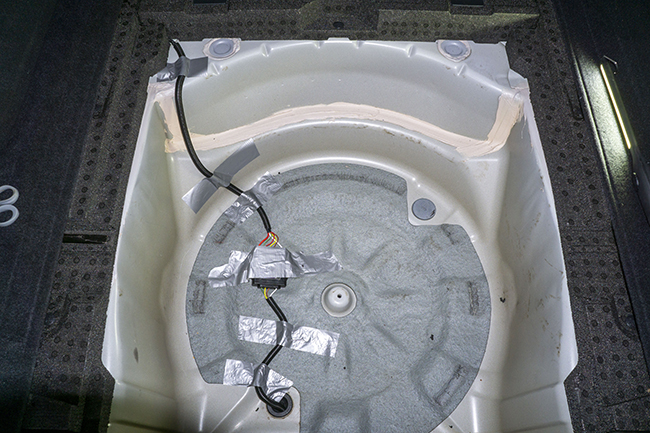
My final routing is still experimental. We will have to wait to see whether the weight of the spare tire chafes the Hopkins wires.
The spare tire presses against the wiring, as that wiring descends down into the spare tire well. It also presses the wires, where they go through the hole in spare tire pan (to the underside of the car).
I do not know whether the black plastic conduit that I installed over the wiring will prevent damage.
It is possible that the linear cut in this conduit — through which you place the wiring that is to be protected — will cut into the wires' insulation, due to the weight of the tire on top of it.
Photographs of the Hopkins harness routing — under the Outback
The hitch on this car is Draw-Tite's Max Frame, reviewed here. It mounts to the car's bumper bolts underneath the rear fascia.
The Draw-Tite's design means that anchoring the Hopkins harness under the car is slightly more complex, than would be to one of the underbody receiver hitches that Etrailer sells.
Those underbody hitches reveal (and make accessible) the width of their crossbars. The Max Frame does not. Its crossbar is entirely concealed, and mostly inaccessible, behind the Outback's rear plastic bumper panel.
I used the center (rear) body tab on my car to support the Hopkins wiring. It's the one that the Draw-Tite instructs users to bend up and toward the front of the car — so as to allow room for the hitch to fit.
I found that — once the Max Frame installation was complete and the body panel was back in place — I could bend the tab partly back toward its initial unbent condition.
This way, the tab can support for the end of the Hopkins harness.
There is a hole in this tab. You can secure the harness (and its 4-pin end cap) in place with a zip tie.
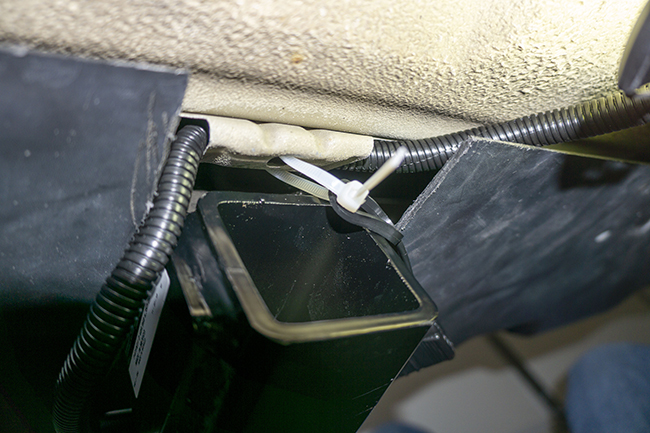
This seems to work reasonably well.
The moral? — Hopkins harness works fine . . .
. . . but it could have been better proportioned for use on Subaru Outbacks.
Hopkins saved a few cents in keeping the wire lengths on both sides of its module shorter than ideal.